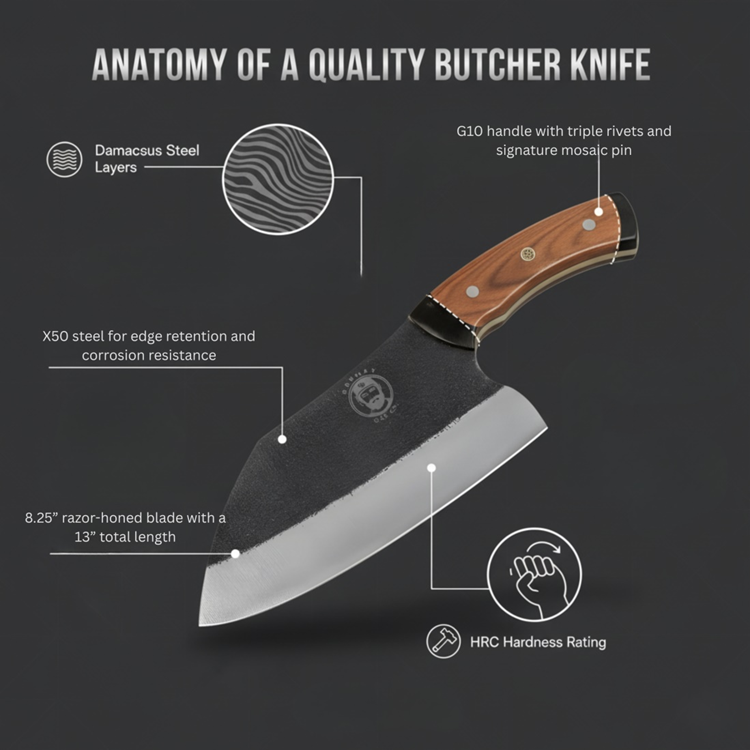
Why Your New Knife Feels Worse After a Year (And How to Fix It)

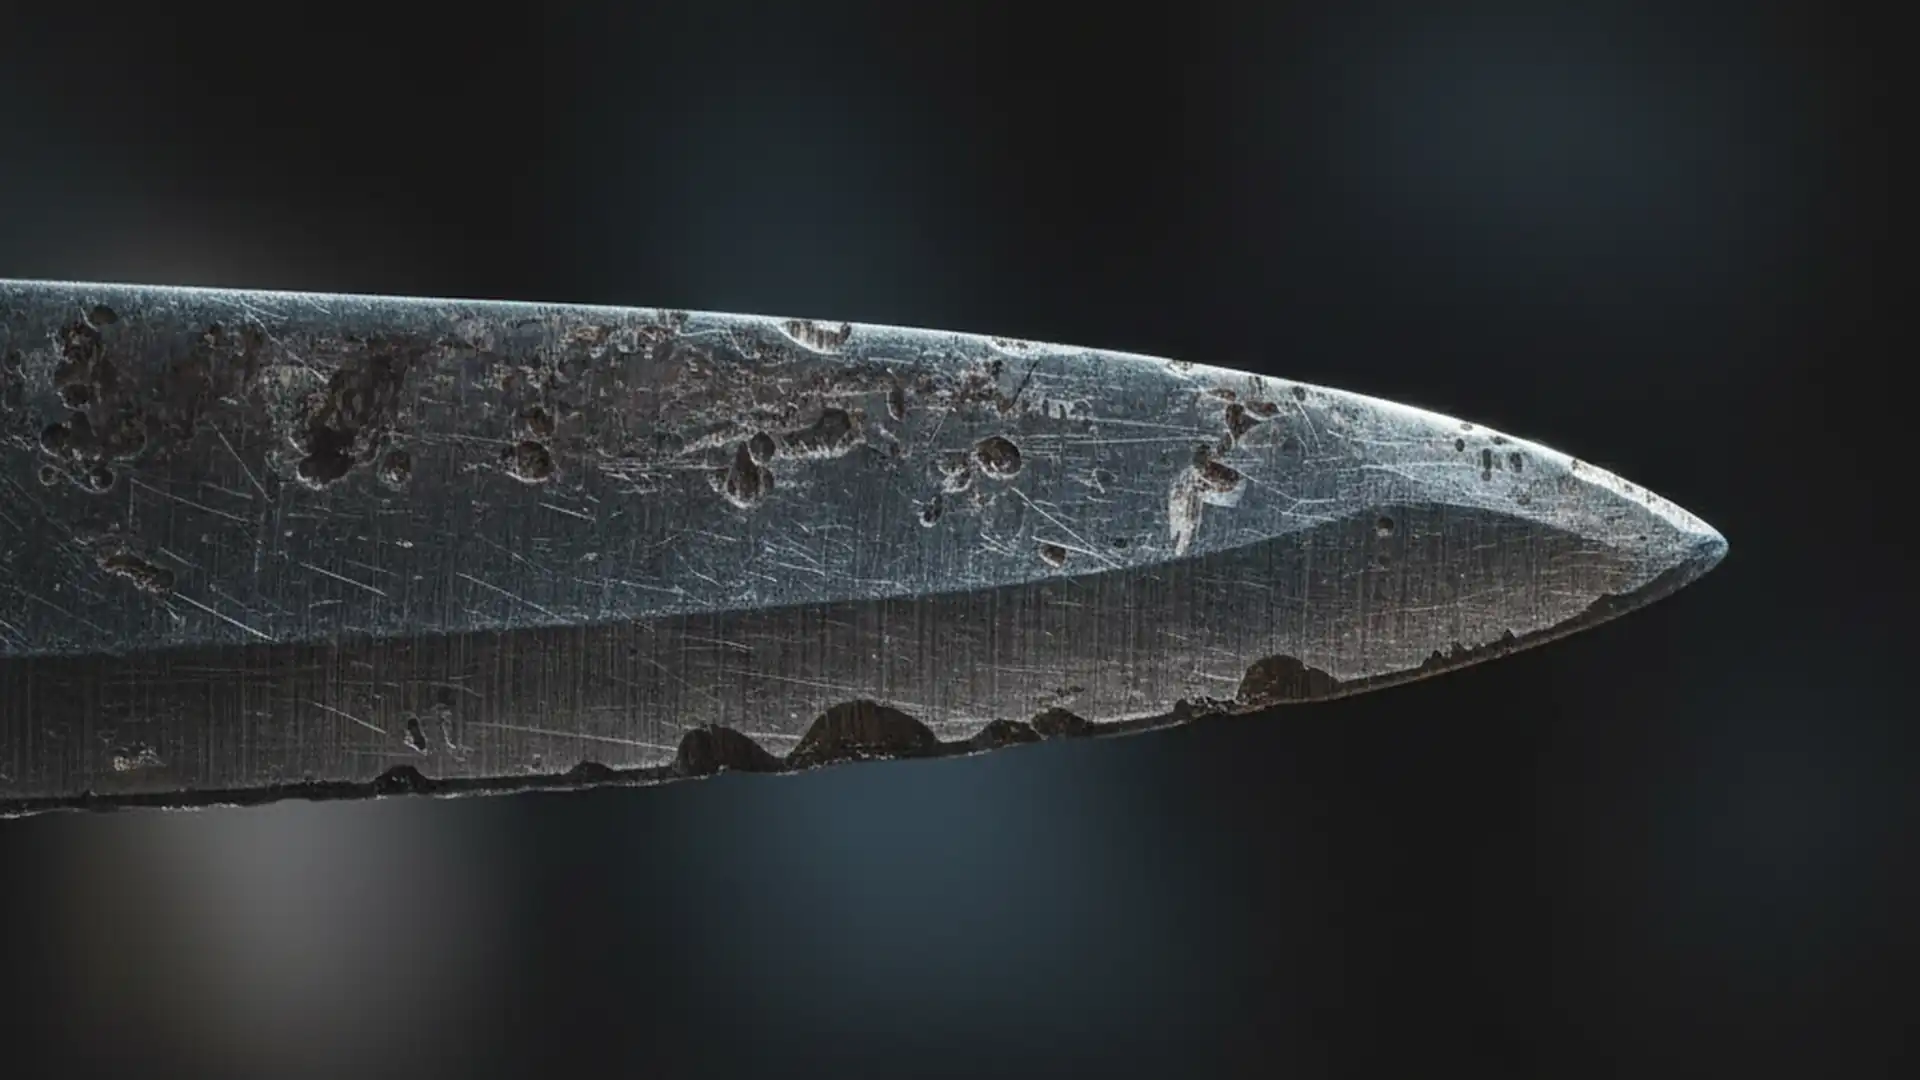
You spent real money on a real knife. The day you unboxed it, you cut through a tomato so cleanly the slice didn’t know it had happened. The onion practically opened itself. You felt like a chef. You posted a photo. Your wife rolled her eyes affectionately.
One year later, the knife feels different. It still cuts. It just doesn’t glide anymore. The tomato resists. The onion needs a small saw motion. The handle has some weird gunk near the bolster. You’ve started reaching for the cheap knife again because the expensive one isn’t worth the disappointment.
Here’s the thing nobody tells you when you buy a quality knife: the “magic” of a fresh edge is temporary, and most home cooks don’t understand what wears off vs what’s recoverable. A year-old knife that feels worse isn’t ruined. It’s signaling that some maintenance is overdue. The fix usually takes 30 minutes and zero new purchases.
This is the no-nonsense breakdown. The five things that quietly degrade in year one. Which problems are reversible at home, which need a pro, and which mean retirement. The 30-minute restoration routine. And the habits that keep year five feeling like year one.
The 30-second answer
Five things go wrong in year one: micro-chips along the edge, lost edge geometry from poor sharpening, gunk under the bolster, slight blade warp from heat or twist, and tip damage from drawer/dishwasher abuse. Most are fixable in 20–40 minutes with a whetstone and elbow grease. A handful need a pro. Almost none mean the knife is dead.
What actually wears down on a kitchen knife
Knives don’t fail uniformly. Different parts age at different rates. Understanding which parts are wearing helps you fix the right thing instead of replacing the whole knife.
The cutting edge (most visible problem)
The very thin metal apex where the blade does the cutting. This is what you “feel” when a knife cuts well. Wears from:
- Cutting board contact (every cut transfers some force back into the edge).
- Hard ingredient contact (frozen items, bones, hidden olive pits).
- Improper sharpening (pull-throughs, wrong angles).
- Storage damage (drawer rummage, bad block design).
- Dishwasher exposure (covered in our Knife in the Dishwasher guide).
The cutting edge is the most visible source of degradation. It’s also the most fixable.
Edge geometry (less visible but bigger impact)
The shape of the metal behind the cutting edge — the bevel angle, the convex grind, the thinness behind the apex. This determines how the knife glides through food.
Pull-through sharpeners and improper whetstone work change the geometry over time. Each pass removes metal at potentially the wrong angle. After 20 careless sharpenings, the knife has a different shape than the one you bought. It cuts, but not the way it used to.
Tip integrity
The tip is the most fragile part of the blade. Gets damaged from:
- Drawer storage (banged into other utensils).
- Dishwasher rack contact.
- Prying (popping open jars, separating frozen meat).
- Dropping (tile, granite, hard floor).
Tip damage shows as snapped tips (catastrophic, needs pro), bent tips (often fixable), or rounded tips (fine for most cooking, problem for precision work).
The handle and bolster area
Two issues:
- Gunk buildup at the seam between blade and handle (food residue, water, soap).
- Handle loosening from wood expansion/contraction or rivet wear.
The gunk is cosmetic and a minor hygiene issue. Loosening is structural and gets worse over time.
Surface finish
The polished or satin finish on the blade flat. Scratches, water spots, mineral deposits. Doesn’t affect cutting performance — affects how the knife looks. Most home cooks ignore this; some can’t.
Diagnosing your year-old knife
Before you buy a new one, run this quick audit:
Test 1: The paper test
Hold a sheet of printer paper at the top. Slice down with the knife.
- Clean glide: edge is fine, problem is elsewhere.
- Tears in spots, glides in others: uneven edge, needs realignment (honing) or sharpening.
- Snags hard, won’t bite: dull edge, needs sharpening.
- Slides over without catching: rounded edge, full sharpening needed.
Test 2: The fingernail test (carefully)
Run your fingernail (gently, perpendicular to the edge) along the cutting edge from heel to tip. Feel for catches or snags.
- Smooth all the way: edge has no chips. Probably just dull.
- Catches at one or two spots: small chips. Whetstone can fix.
- Catches in many spots: chips throughout. Pro sharpening territory.
- Catches large pieces: structural damage. Decide: fix or retire (covered in our When to Retire guide).
Test 3: The flat-surface check
Place the knife flat on a counter, edge down. Look from the side at eye level.
- Edge touches counter evenly: blade is straight.
- Daylight under the heel or middle: blade has warped. Pro can sometimes fix; severe warps mean retirement.
Test 4: The handle wiggle
Hold the handle, give a gentle twisting force.
- Solid: handle is fine.
- Slight movement: rivets loosening or wood handle expanding. Needs attention soon.
- Obvious wobble: safety issue. Don’t use until fixed or retired.
Test 5: The bolster gunk inspection
Look closely at where the blade meets the handle. Use a small light if needed.
- Clean: nothing to do.
- Slight discoloration: normal patina or surface oxidation. Buff with Bar Keepers Friend.
- Crusty buildup: food residue trapped in the seam. Clean with a soft brush and detergent.
- Dark mold-like growth: water and food trapped together. Aggressive cleaning needed; this is the #1 cosmetic-but-also-hygiene problem.
The 30-minute restoration routine
Most year-old knives can be brought back to 90% of new condition in about 30 minutes of work.
Step 1: Deep clean (5 minutes)
- Hot water, dish soap, soft sponge.
- Pay special attention to the bolster seam and the underside of the handle near the blade.
- Use an old soft toothbrush to scrub gunk in tight spots.
- Towel dry immediately and completely.
Step 2: Surface restoration (5 minutes)
- Bar Keepers Friend or similar mild abrasive cleanser on a damp cloth.
- Rub spine-to-edge along both sides of the blade.
- Removes water spots, surface oxidation, light staining.
- Rinse, dry.
Step 3: Sharpening (15 minutes)
- Use a whetstone (1000-grit minimum, 4000-grit for refinement). Soak the stone if it’s a soaking type.
- Match the original bevel angle (15° for Japanese, 20° for German).
- Use the marker trick: color the bevel with a Sharpie, take a few strokes, see where the marker disappeared. Adjust angle until you’re hitting the actual bevel.
- Alternate sides. 8–12 strokes per side at 1000-grit, then 4–6 strokes per side at 4000-grit.
- Deburr with a cork or felt block, or strop on a leather strap.
(Full sharpening technique covered in our Honing vs Sharpening guide.)
Step 4: Tip check (3 minutes)
- Inspect the tip from multiple angles.
- If the tip has rolled (bent slightly), light pressure on a 1000-grit stone perpendicular to the spine straightens it.
- If the tip is rounded, a few strokes on the 4000-grit stone restores the point.
- If the tip has snapped off, it’s pro territory.
Step 5: Final polish and oil (2 minutes)
- Wipe the blade with a clean cloth.
- For carbon steel: light coat of food-grade mineral oil or camellia oil. Wipe off excess.
- For stainless: a wipe with mineral oil is optional — adds shine, prevents future water spots.
- For wood handles: a touch of food-safe wood oil or board cream once a year.
Total time: about 30 minutes. Total cost: $0–$25 if you already have basic supplies. Result: a knife that feels close to new again.
Problems you can’t fix at home
Some issues require professional help (or replacement):
- Snapped tip more than 1mm: requires reshaping the entire tip area. Pro service, $30–$60.
- Blade warp visible to the eye: some pros can straighten mild warps; severe warps mean retirement.
- Deep pitting from rust: grinding out pits removes too much steel. The knife loses height and integrity.
- Loose riveted handle: can be re-riveted by a pro on quality knives ($60–$120). Cheap knives don’t merit the cost.
- Cracked wood handle on premium Japanese knives: rehandling possible at $80–$150. Worth it for genuine premium blades.
- Heat damage from a forgotten-on-stove incident: if the steel discolored from heat, the temper may be ruined. Often unfixable.
The most common cause of “feels worse” (and the fix)
The honest #1 reason a year-old knife feels worse: nobody sharpened it correctly.
Most home cooks either:
- Never sharpened it at all in 12 months.
- Used a pull-through sharpener which damaged the geometry.
- Did 3 strokes on a steel rod and called it “sharpening.”
The cumulative result is a knife with a worn, rounded, or misshapen edge. The “magic” you remember from day one was the factory edge. Once that edge wore down, nothing replaced it properly.
The fix is real sharpening — whetstone or pro service — and it usually brings back 90% of the original feel. Many home cooks discover their knife is fine after a single proper sharpening.
The “but it’s a premium knife” trap
Premium knives don’t sharpen themselves. The expensive Japanese knife you spent $300 on still needs the same maintenance as a $60 knife — actually more, because the harder steel is less forgiving of bad sharpening.
A $60 Wüsthof Classic in good shape outperforms a $300 neglected Misono UX10. The neglect costs more than the steel quality gains.
If you spent real money on a quality knife, learn to maintain it. A whetstone session every 4–6 months turns the investment into a 30-year tool. Skip the maintenance and the same knife is a 4-year tool that ends up disappointing.
Year 1 vs year 5: the maintenance plan
| Frequency | Task |
|---|---|
| Every cooking session | Hand-wash, towel dry, store properly |
| Every 2–3 sessions | Hone with ceramic rod (covered in Honing guide) |
| Monthly | Paper test, fingernail check on edge |
| Every 3–6 months | Full whetstone sharpening (or pro) |
| Yearly | Deep clean, surface restoration, light oil |
| Every 2–3 years | Full inspection — handle, tip, profile |
| Every 5 years | Consider professional service for fine adjustments |
Total time investment per year: about 4–6 hours across the calendar. Worth it for any knife you paid more than $80 for.
Habits that prevent year-2 disappointment
- Hand-wash and dry immediately after every use. No exceptions.
- Never put it in a dishwasher (full reasoning in our Dishwasher guide).
- Magnetic strip or in-drawer organizer with sleeves. Never loose in a drawer.
- Cut on wood or HDPE only. Never glass, marble, or bamboo. (Covered in Cutting Board Showdown.)
- Hone before every serious cooking session.
- Sharpen properly every 3–6 months. Skip pull-through sharpeners.
- Don’t use it as a screwdriver, can opener, or pry bar. Especially the tip.
- Don’t cut frozen food. Defrost first.
- Don’t twist the blade through ingredients. Slice with the edge, not the side.
That’s the entire list. The knives that look 5 years old after 18 months had at least one of these habits broken regularly. The knives that look new at year 5 had every habit followed.
Marketing traps in the “save your knife” category
- “Self-sharpening knife blocks.” They have angled ceramic strips that hone (badly) at fixed angles. Damages edges over time. Skip.
- “Diamond restoration kits.” Heavy-grit diamond stones for “saving” damaged knives. Useful in pro hands; aggressive enough to ruin home knives if used wrong. Beginner-unfriendly.
- “Magnetic blade restoration.” Not a thing. Magnets don’t restore steel.
- “Knife revitalizer cream.” Polish with marketing. Same as Bar Keepers Friend at 5x the price.
- “Lifetime warranty” knives where the warranty quietly excludes normal wear. Read the fine print. Most warranties cover defects, not the result of dishwasher cycles.
When the knife is actually worth replacing
Some knives at year 1–2 genuinely should be retired:
- The under-$30 knife that came with a 12-piece set. The steel was never great; restoration won’t make it premium. Replace, don’t restore.
- The “Damascus” knife with a now-faded laser pattern. The pattern was the only premium thing about it. (See our Spot Fake Damascus guide.)
- The free promotional knife from a kitchen subscription box. It was free. Treat it as such.
For these, the restoration time is worth more than the knife. Get a real $60–$120 chef’s knife and treat it well. Year 2 will look very different.
If you only remember five things
- “Feels worse” almost always means the edge needs real sharpening.
- 30-minute home restoration handles most year-1 problems.
- Pull-through sharpeners are the #1 hidden destroyer of premium knives.
- Bolster gunk is fixable. Loose handles are pro territory.
- The maintenance plan is short. Five hours a year keeps a knife sharp for 25 years.
FAQ
How often should I send a knife for professional sharpening vs DIY?
If you have a whetstone and basic skill: DIY every 3–6 months. Pro every 2–3 years for fine adjustments. If you don’t sharpen at all: pro every 6–12 months at minimum.
Can I sharpen a Japanese knife on a German angle?
Don’t. Japanese knives are 12–16° per side; German knives are 18–22°. Sharpening a Japanese blade at 22° turns it into a thicker, less precise edge. Match the original angle. The marker trick (Sharpie on the bevel) tells you what angle the bevel is at.
Why does my knife rust in spots even though it’s stainless?
Three usual causes: (1) drying incomplete, (2) high-pH cleaning agents stripping the chromium oxide layer, (3) cheaper “stainless” steel that isn’t fully corrosion-resistant. Fix the drying habit, switch to mild dish soap, and accept that cheaper stainless rusts a little.
What’s the cheapest whetstone setup that actually works?
A combination 1000/4000-grit stone (King, Naniwa, Suehiro) for $30–$50, plus a stone holder ($10) and a $6 angle guide. Total under $60. Lifetime kit for any home knife collection.
Can I use a Sharpmaker or guided system for restoration?
Yes. Spyderco Sharpmaker, Lansky, Work Sharp Precision Adjust — all genuine alternatives to whetstones for people who don’t want freehand work. Pre-set angles remove guesswork. Slightly less flexible for unusual knife geometries.
Will buffing the surface scratch the blade?
Bar Keepers Friend on a soft cloth: minor surface dulling that’s only visible to you under specific lighting. Steel wool: noticeably scratches. Stick to soft abrasives.
Should I oil my stainless knife?
Optional. A monthly wipe of mineral oil prevents future water spots and adds visual shine. Required for carbon steel; optional for stainless.
The Grumpy Dad Promise
Before you buy a new knife to replace the one that “feels worse,” spend 30 minutes on the one you have. Deep clean. Surface buff. Whetstone session. Tip check. Final wipe. Most knives come back to near-new condition.
The “magic” you remember from day one isn’t gone — it’s hiding under a year of small neglects. Restore it once and learn the habits that prevent it from happening again. Now go check your knife. The fix is shorter than the shopping trip would have been.