Grilling Season Opener: The Only Setup Guide You Need

The grill has been sitting since November.
Maybe longer. You closed it up after Thanksgiving, told yourself you’d clean it before winter, and then winter happened and the cover went on and there it stayed. Now it’s May, the weather has shifted, someone mentioned a cookout, and there’s a small chance the grill hasn’t been opened since the Patriots scored or the Packers won or whoever it was that made you want to torch something.
That’s fine. That’s most grills in most backyards. This is the guide for getting it right again in an afternoon — so that the first real cook of the season doesn’t produce the smells and flavors of last October’s drippings.
The Opening Inspection
Before you light anything, look at it. Five minutes of checking now prevents two problems later: a grill that won’t perform properly, and a grill that becomes a small emergency.
Gas grill:
The burners. Remove the cooking grates and flavorizer bars (or lava rocks, or ceramic briquettes, depending on your setup). Look at the burners directly. You’re looking for: holes clogged with grease or rust, cracks or splits in the burner tubes, and spider webs or insect nests inside the burner housing. Both spiders and mud daubers build nests in burner tubes over winter. A blocked burner produces uneven heat at best and a flashback fire at worst.
If a burner is clogged, clean it with a burner brush or a straightened wire hanger pushed through each port hole. If a burner is cracked or heavily rusted through, replace it before lighting. Burners for most major brands are $15 to $40 and take 15 minutes to swap.
The igniter. Push it with the lid open. If it doesn’t spark, check the battery (most have a AA behind the igniter button). If the battery is fine and there’s still no spark, the igniter electrode may be cracked or the wire may have corroded over winter. You can cook fine without the igniter — use a long lighter — but note it for replacement.
The gas lines and connections. With the gas off, mix dish soap and water and apply it to the hose connections and regulator. Turn the gas on slowly without lighting anything. Bubbles mean a leak. Do not light the grill if you see bubbles. Tighten the connection or replace the hose ($15 to $25) before proceeding.
The grease trap. This is the most commonly neglected part of gas grill maintenance, and it’s the source of most grease fires. The drip tray or grease cup underneath the grill collected everything from last season. If it’s full — and after a season it usually is — empty it, wash it, replace it.
Charcoal grill:
Simpler to inspect. Remove the grates and look at the interior. Old ash, if left in the firebox over winter, absorbs moisture and becomes mildly corrosive. Dump it entirely. The grates need inspection for rust and warping. A grate with surface rust is cleanable. A grate that’s warped or has significant rust-through needs replacement.
Check the vents — top and bottom — for blockage. The vents control your fire. A clogged vent means you can’t control temperature. Make sure they open and close freely.
The Clean
Once you’ve inspected and addressed anything structural, clean everything the fire will touch.
The grates: This is where most people use the wrong tool.
Wire-bristle brushes have been the default grill brush for decades. They’re also responsible for thousands of trips to the emergency room annually — bristles break off, land on the grate, and end up in food. This is not hypothetical. This happens regularly enough that most grilling experts have stopped recommending them entirely.
The alternatives actually work better:
Bristle-free grill brush: Stiff coiled wire or woven stainless mesh does the same mechanical work without the bristle-loss risk. The bristle-free replaceable brush in the Grumpy Dad catalog uses a heavy-duty scrubbing head on one side and a scraper on the other. That’s all you need.
Chain mail scrubber: The same tool used to clean cast iron. On a hot grate, a chain mail pad removes carbonized debris without leaving anything behind.
Onion method: Cut a yellow onion in half, skewer the flat side, and scrub the hot grate with it. The moisture and acids in the onion loosen debris. It sounds improvised because it is. It works because it does.
Regardless of method: clean the grates while they’re hot. Cold grates make cleaning harder. Heat loosens grease and carbon — use it.
The interior walls: Carbonized grease on the inside walls of a gas grill is insulation you don’t want and fire risk you don’t need. Use a putty knife or grill scraper to knock the heavy buildup off the walls and lid. Then wipe with a damp cloth. You’re not getting it restaurant-clean. You’re getting it to the point where the layer that’s there is a thin, stable coat rather than a thick, flaking one.
The exterior: Whatever your grill’s exterior is made of, wipe it down. Stainless steel gets a wipe-down with a damp cloth followed by stainless steel cleaner applied with the grain. Painted exteriors just need cleaning, no conditioner. The point is to start the season clean, not to make it look new — it won’t look new. It will look like a grill that’s been used and maintained, which is exactly what it should look like.
What to Restock
While you’re at it, check what you have and what needs to be replaced or replenished. A grill that works and a cook that goes sideways because you ran out of something is an avoidable frustration.
Fuel:
Charcoal: Don’t use charcoal that’s been sitting open in a bag over a damp winter. Old charcoal that’s absorbed moisture lights poorly and produces less heat. A fresh 20-pound bag runs $12 to $18. Worth it.
Propane: An 80% full tank from last fall is fine. A tank that’s under 25% is worth filling before the season’s first big cook rather than mid-cook when the flame starts dropping. Most hardware stores, Walmart, and many gas stations do propane exchanges for $20 to $25.
The thermometer: Do you have a probe thermometer? Not a grill surface thermometer — a probe that goes into the meat. If the answer is no, this is the single most useful purchase you can make for the season. The MEATER Plus wireless probe reads internal temperature and ambient grill temperature simultaneously, sends alerts to your phone, and takes the guesswork out of every cook. The days of pressing a steak with your thumb to guess doneness are over. They should have been over years ago.
Consumables: Foil, paper towels, grilling gloves, a reliable lighter. These are inexpensive, you don’t want to be without them, and they’re the kind of thing you forget until you need them.
The First Fire
Before cooking any food, run the grill at high heat for 10 to 15 minutes with the lid closed.
For a gas grill: turn all burners to high, close the lid, let it run. This burns off any residual moisture, kills anything that shouldn’t be in there, and re-seasons the grates with the heat.
For charcoal: build a chimney full of coals, let them fully light (they’re ready when the top coals are beginning to ash over — about 15 to 20 minutes), pour them into the grill, add the grates, close the lid and let it run on high for 10 minutes.
Then brush or scrub the grates one more time while they’re screaming hot. Now you’re cooking.
The First Cook
Here’s the counterintuitive advice for the first cook of the season: don’t make it complicated.
The first grill session of the year is for recalibrating. Relearning how your grill holds temperature. Relearning where the hot spots are (every grill has them). Getting your timing back.
A skirt steak is perfect for this. It’s forgiving, it cooks fast, it tells you immediately whether your heat is right. Get a good fire going, let the grates heat properly, season the steak aggressively with salt and pepper, and cook it over direct high heat — 2 to 3 minutes per side for a 1-inch skirt, resting 5 minutes after.
That cook will tell you everything you need to know about whether your setup is right. Too much char with underdone interior: grill is too hot or the steak is too thin. Underdone all the way through without color: the grill isn’t hot enough, or you need to preheat longer.
Note what happens. Adjust. The second cook is easier. The third one is where you’re back to where you were last fall.
The Gear That Belongs at Every Grill Station
This is the kit that makes a season go smoothly rather than involving trips back to the kitchen every 15 minutes.
A probe thermometer (MEATER Plus, or similar) — already covered. Non-negotiable if you cook proteins with any regularity.
A bristle-free grill brush — for every pre-cook and post-cook grate cleaning.
A pair of long-handled tongs (16″) — your primary tool. Don’t use a fork. Puncturing proteins causes juice loss. Tongs, always.
A cast iron skillet on the grill — for searing steaks, cooking eggs at camp, finishing dishes that need a flat surface. The Lodge 12″ is the workhorse.
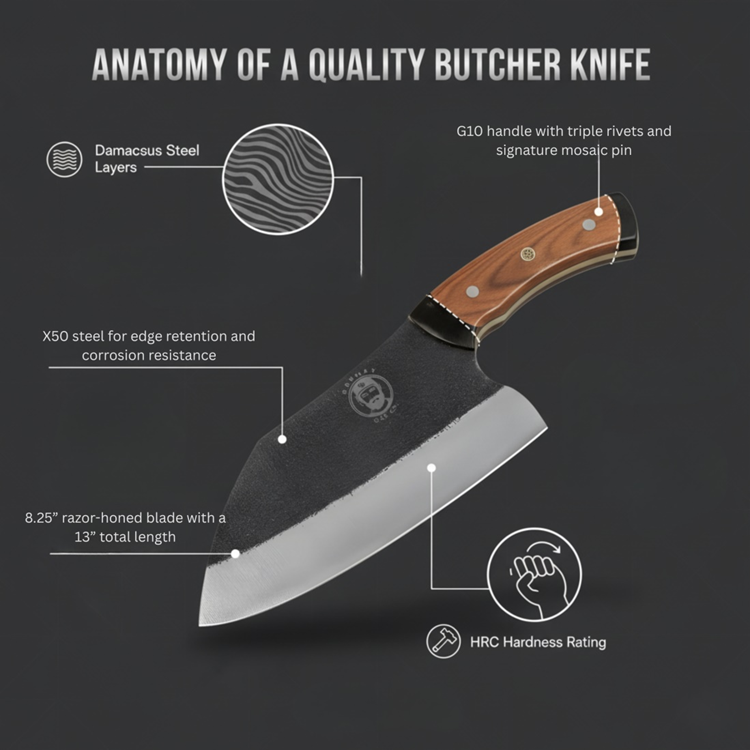
A sharp knife at the station — not a kitchen knife you carry outside. A dedicated outdoor knife or a beater chef’s knife that stays near the grill, used for trimming, carving, and portioning at the board. A sharp blade saves more time in outdoor cooking than in indoor cooking because the board is set up at the grill rather than the kitchen counter.
Long-handled skewers — stainless steel, flat profile so the food doesn’t rotate. For vegetables, shrimp, kebabs, anything that benefits from grill contact on all sides without a basket.
What to Cook This Weekend
You’ve cleaned it. You’ve lit it. You’ve recalibrated.
Here’s the unofficial grilling season opener menu, designed to work with the setup you have and use the tools that are now in place:
Saturday lunch: Skirt steak or flank steak, direct high heat, rested and sliced against the grain. Simple salad, good bread.
Saturday dinner (if you’re cooking again): Chicken thighs, indirect then direct. 45 minutes to an hour at medium heat, last 5 minutes over direct high heat to crisp the skin. The internal temperature target is 165°F, but 175°F in the thigh is where the collagen breaks down and the meat is actually tender rather than just safe. Use the probe.
Sunday afternoon: Something slow. Ribs. Brisket. Whatever you’ve been mentally planning since the grill closed in November. The season is open. You’ve got all day.
Grumpy Dad Co. — Good fire. Right tools. No shortcuts.
Browse the full outdoor cooking and grilling collection at grumpydadco.com