How to Set Up Two-Zone Grilling (The Technique That Changes Everything)

Most backyard grilling problems come from one source: everything is cooked over the same heat.
Direct, high heat works perfectly for thin cuts — skirt steak, chicken wings, shrimp, vegetables. For anything thicker or denser — chicken breasts, pork chops, bone-in thighs, whole fish — direct heat burns the outside before the inside is done. You end up with charred exteriors and raw interiors, or raw-adjacent surfaces because you backed off the heat to compensate.
Two-zone grilling solves this. It’s not a technique for advanced grillers. It’s the fundamental setup that everyone should be using, and most people aren’t.
What Two-Zone Grilling Is
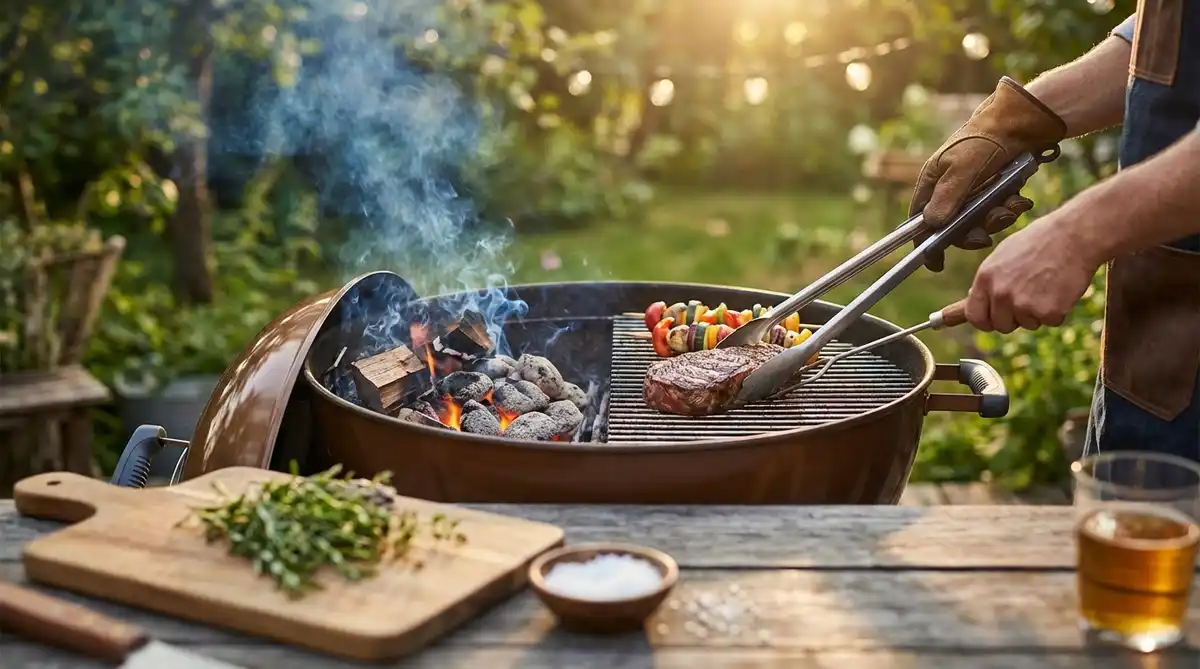
Two-zone grilling divides the grill into two distinct areas:
Hot zone (direct heat): Where the fire is. High temperature. Used for searing, charring, crisping skin, developing crust.
Cool zone (indirect heat): Away from the fire. Lower temperature — typically 250°F to 350°F depending on setup. Used for cooking thick cuts through without burning the exterior, holding finished food, and smoking.
The combination gives you the capability of two different cooking environments on one piece of equipment. You can start a thick chicken thigh in the cool zone, cook it through gently, and finish it in the hot zone for color. Or sear a thick steak in the hot zone, then move it to the cool zone to coast to the right internal temperature. Or hold already-finished items in the cool zone while you finish the rest of the cook.
One grill, two tools.
Setting It Up: Charcoal
On a kettle or charcoal grill, two-zone setup is straightforward.
The bank: After lighting your coals in a chimney and letting them ash over (15 to 20 minutes), pour them all onto one side of the grill. Not spread across the full base — banked to one side, creating a pile of hot coals on that half and nothing but the grate on the other.
The coal side is the hot zone. The empty side is the cool zone. It’s that simple.
Adjusting heat:
– More coals or coals closer to the grate = hotter direct zone
– Vents open = more airflow = hotter fire
– Vents closed = less airflow = lower temperature across the board
For most two-zone charcoal setups, the cool zone (with the lid closed) runs 275°F to 325°F. This is ideal for indirect cooking of thick proteins.
The snake method (for lower, longer cooks): Instead of banking all the coals together, arrange unlit coals in a C-shape along the perimeter of the grill. Place 10 to 15 lit coals at one end of the snake. The fire slowly burns along the snake over 4 to 6 hours, maintaining a steady 225°F to 250°F. This is the charcoal setup for ribs, chicken, and anything requiring sustained indirect heat without refueling.
Setting It Up: Gas
On a gas grill, two-zone setup requires only turning some burners on and leaving others off.
Two-burner gas grill: Light one burner on high. Leave the other off. The lit burner is the hot zone. The unlit burner side is the cool zone.
Three or more burners: Light the burners on one side. Leave the other side off. Or light the outermost burner on each side and leave the middle burner off — this creates a hot perimeter with a cool center, useful for larger cuts that benefit from indirect heat from both sides.
Temperature management:
The cool zone temperature on a gas grill is determined by how hot the lit burners are and how well the lid seals. With one burner on high and a well-sealing lid, the cool zone typically runs 300°F to 350°F. For lower temperatures (for ribs or slow-cooking), turn the lit burner to medium.
The limitation of gas: Gas grills don’t maintain as stable a low temperature as charcoal and don’t offer as wide a range. For very low indirect cooking (225°F), charcoal is more reliable. For moderate indirect cooking (300°F to 350°F), gas works well.
How to Use It: Three Scenarios
Thick Chicken Thighs or Breasts
The problem with direct heat only: The surface chars and tightens before the interior reaches 165°F. You get burned skin with undercooked meat, or fully cooked meat with incinerated skin.
The two-zone solution: Place the chicken skin-side up in the cool zone. Close the lid. Cook at 300°F to 325°F indirect until the internal temperature reaches 150°F (thighs) or 155°F (breasts). Then move to the hot zone, skin-side down, for 3 to 4 minutes of direct heat to crisp the skin and develop color.
Result: fully cooked interior with properly rendered, crisped skin. No guesswork about doneness. No burned exterior.
Thick-Cut Pork Chops
Pork chops at 1.5 inches thick are almost impossible to cook correctly over direct heat — the outside is done in 5 minutes, the inside needs 12. Two-zone solves this.
The method: Indirect zone first, 275°F to 300°F, until internal temperature reaches 130°F (about 20 to 30 minutes). Then move to direct high heat, 2 minutes per side, for the sear. Rest 5 minutes. Internal temperature will carry over to 140°F to 145°F — the target for pork.
The result: juicy interior with a proper crust. Exactly what a pork chop is supposed to taste like and rarely does when cooked without thought.
Whole Fish
Whole fish over direct heat is a study in anxiety — the skin sticks, the flesh overcooks in spots, the whole thing falls apart on the flip.
The two-zone solution: Oil the fish thoroughly, season inside and out. Place in the cool zone, close the lid, and cook at 300°F for 8 to 12 minutes per side depending on size. The gentler heat cooks the fish through without charring the skin immediately. A 2-minute move to the direct zone at the end crisps the skin.
The fish releases from the grate cleanly when properly cooked — if it sticks, it’s not done on that side yet.
The Holding Zone
One often-overlooked use of the cool zone: holding food that’s finished while you cook the rest.
A chicken thigh that came off the grill perfectly is done. The rest of the thighs need 3 more minutes. The cool zone holds the finished thighs at temperature (around 140°F to 150°F in the indirect zone) without continuing to cook them. They stay hot and moist while you finish the batch.
This is how to get an entire grill full of protein to the table simultaneously — stage the finishes, hold in the cool zone, serve together.
The Probe Thermometer Connection
Two-zone grilling is where a probe thermometer like the MEATER Plus earns its place completely. The cool zone gives you the time to monitor temperature properly — you’re not racing against a blazing fire. Set the target (150°F for chicken to transfer to direct, 125°F for steak to sear), get the alert, move the protein, finish on direct heat.
The method and the tool are designed for each other.
The Short Version
Two-zone grilling isn’t advanced. It’s the default setup that produces better results on almost everything thicker than a skirt steak.
Bank the coals to one side or leave half the gas burners off. Hot zone for searing. Cool zone for cooking through. Everything in between is just learning what goes where.
Set it up this weekend on your first cook. You won’t go back to one-zone cooking.
Grumpy Dad Co. — The technique behind the tool.
Browse the full outdoor cooking and grilling collection at grumpydadco.com