The Honest Dad’s Guide to Brewing Specialty Coffee at Home
You bought good coffee.
Quick answer: To brew great specialty coffee at home, nail four things in this order — grind fresh with a burr grinder, use filtered water at 195–205°F, hold a 1:16 coffee-to-water ratio (about 60g per liter), and pick a method like pour-over or French press. Get those right and you beat 90% of coffee shops.
- The four things that matter, in order: grind quality and freshness, water quality and temperature, ratio, then method and time. Everything else is refinement.
- A burr grinder beats a blade grinder because it crushes beans to a uniform size for even extraction — blades chop chaotically and produce a bitter-and-sour mediocre cup.
- Water should be filtered, not distilled, and heated to 195–205°F — boiling water (212°F) scorches light and medium roasts.
- Start at a 1:16 ratio (60g coffee per liter of water) and adjust to taste; a $15 kitchen scale removes all the guesswork.
- Grind fresh and buy whole bean — coffee peaks 2 to 4 weeks post-roast, and pre-ground is just flavor escaping into the air.
That’s step one, and most people never take it. They reach for the same bag, same machine, same result — a cup that’s warm and caffeinated and completely forgettable. If you’re reading this, you’ve already moved past that.
Step two is not ruining what you paid for.
This guide is not going to tell you to buy a $600 grinder or memorize pour rates. It’s going to tell you the four things that actually matter, the order in which they matter, and what to buy if you want to step up your equipment without wasting money on gear you don’t need.
The goal is a great cup of coffee. Every morning. Without turning it into a project.
The Four Things That Actually Matter
Everything in coffee brewing comes down to four variables. Get these right and you’ll make a better cup than 90% of what you can buy at a coffee shop. Get them wrong and it doesn’t matter how good the beans are.
1. Grind quality and freshness 2. Water quality and temperature 3. Ratio 4. Method and time
That’s the list. In that order of importance. Everything else is a refinement on top of these four.
Variable One: Grind Quality and Freshness
This is the most important upgrade most people can make, and it’s the one most people skip because they already have a blade grinder from 2009 and it technically works. If you want the full breakdown before buying, the grinder guide that explains why it matters more than the beans is worth two minutes.
It does technically work. The same way a steak knife technically works for boning a fish. Technically. Not well.
Blade grinders chop. They spin a blade at high speed and produce a chaotic mix of particle sizes — some powder-fine, some chunk-coarse, everything in between. When you brew that uneven grind, the fine particles over-extract (bitter, harsh) and the coarse chunks under-extract (flat, sour) simultaneously. The cup averages out to mediocre regardless of what you started with.
Burr grinders crush. Two abrasive surfaces — the burrs — held at a fixed distance apart. Every particle that passes through comes out roughly the same size. Even extraction. Consistent cup. Every time.
You don’t need to spend a lot of money to get there. A basic electric burr grinder like the Baratza Encore runs around $170 and will outlast most appliances in your kitchen. If you want to spend less, a manual hand grinder — the TIMEMORE Chestnut C2S manual conical burr grinder, for example — produces excellent results for $50 to $150 and lasts essentially forever because there’s almost nothing to break.
The second part of this is freshness. Grind your beans right before brewing, not the night before. Not in the morning before you get in the shower. Right before brewing. Coffee degasses CO2 as it sits — the same CO2 that creates the bloom during pour-over — and once the volatile aromatics are released to the air, they’re gone. Pre-ground coffee is an open container of flavor escaping. A whole bean stays sealed until you crack it.
If you buy pre-ground coffee: buy it in smaller quantities, store it in an airtight container, and plan on losing some quality. It’s still a step up from nothing, but don’t wonder why the cup isn’t matching the bag’s tasting notes.
Variable Two: Water Quality and Temperature
Coffee is approximately 98% water. This fact is obvious and widely ignored.
If your tap water tastes like anything — chlorine, minerals, rust, anything — that’s what your coffee tastes like, underneath whatever the beans are producing. Filtered water doesn’t need to be expensive. A basic pitcher filter or a faucet-mounted filter is sufficient. You’re removing the things that fight the coffee’s flavor, not chasing some platonic ideal of water purity.
Completely distilled or reverse-osmosis water, counterintuitively, doesn’t work well either. Water needs some dissolved minerals to facilitate extraction — magnesium and calcium in particular help pull soluble compounds from the grounds. Distilled water produces a flat, under-extracted cup. You want clean water, not sterile water.
Temperature matters more than most people expect. Boiling water — 212°F — scorches light and medium roasts. It hits the grounds too aggressively, over-extracting bitter compounds before the desirable ones have a chance to develop. The target range for specialty coffee, particularly washed high-altitude coffees like a Panama Geisha, is 195°F to 205°F.
The easiest way to hit that range without a thermometer: bring water to a full boil, take it off the heat, wait 30 to 45 seconds. You’ll be close. If you want precision — and precision is worth it for good coffee — a temperature-controlled kettle like the Fellow Stagg EKG or the Bonavita 1L holds your target temperature, turns on when you tell it to, and keeps the water ready when you walk into the kitchen. That’s a $50 to $90 investment that changes the daily experience of making coffee from a process into a habit.
A gooseneck spout, on any kettle, helps with pour control — relevant for pour-over, less so for French press. If you’re doing drip, just get the water temperature right and the pour rate handles itself.
Variable Three: Ratio
Here is the standard ratio for specialty coffee: 60 grams of coffee per one liter of water. Or approximately one gram of coffee per 16 grams of water. Or roughly two level tablespoons per six ounces of water if you insist on volume measurements.
The ratio matters because extraction is a function of contact time, temperature, grind size, and how much coffee is in the system. Change the ratio and you change the balance. Too little coffee produces a watery, over-extracted cup. Too much coffee produces a strong but under-developed cup.
Start at 1:16. Adjust from there based on preference. If the cup tastes too strong, use slightly less coffee or more water. If it tastes thin, go the other direction. The ratio is your baseline, not your sentence.
A kitchen scale makes this trivially easy. A basic digital scale that reads in grams — anything accurate to one gram — is a $10 to $20 purchase that removes all the guesswork from coffee brewing. You’re not doing chemistry. You’re doing the thing that gives you the same result every morning without thinking about it. That’s worth $15.
People who resist the scale are usually the same people who eyeball their BBQ rub and wonder why it’s inconsistent. Measure once, calibrate your instincts, then trust the instincts. You still end up free-handing it eventually — but you know what you’re aiming for.
Variable Four: Method and Time
There are more coffee brewing methods than anyone needs to evaluate all at once. Here’s the honest ranking by what they produce and who they’re for.
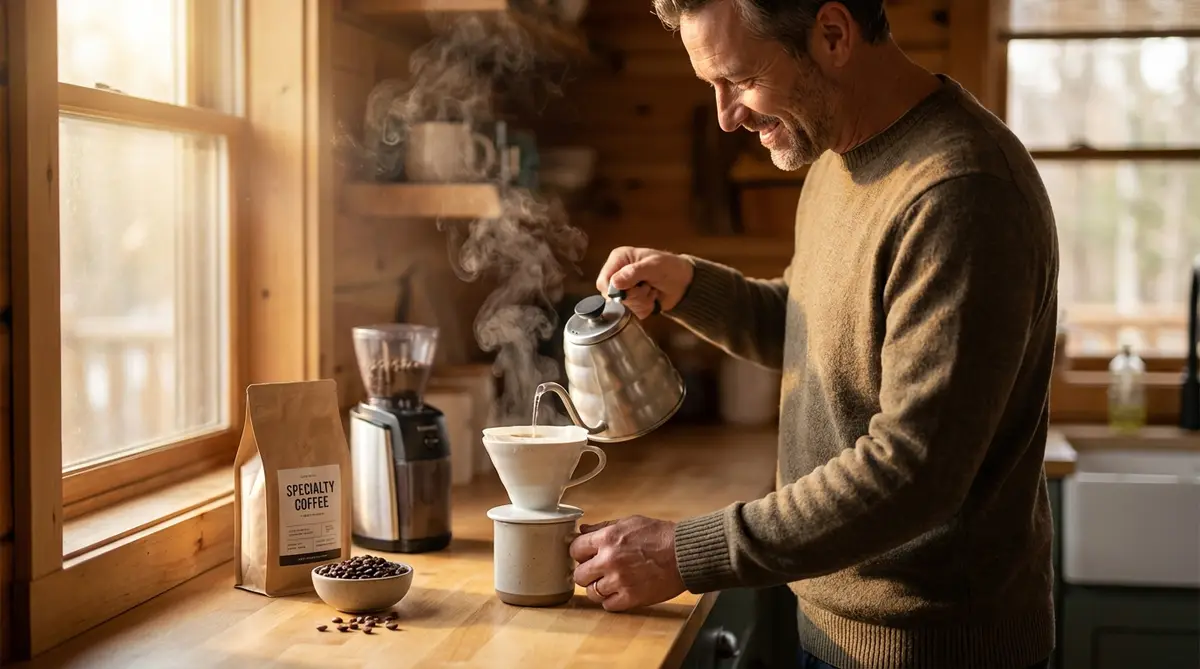
Pour-Over (V60, Chemex, Kalita Wave)
The method that gives you the most control and the clearest cup. You’re in charge of the pour rate, the bloom, the total draw-down time. Paper filters produce the cleanest, most transparent extraction — all the aromatic compounds in your coffee come through without the oils that a French press or metal filter retains.
For a washed, high-altitude single origin like Morning Tolerance, pour-over is the right tool. The clarity of the method matches the clarity of the coffee. You’re not adding anything. You’re not subtracting anything.
The process: heat your water. Weigh your coffee. Grind medium-coarse. Rinse your paper filter (removes paper taste, preheats the dripper). Add grounds. Pour roughly twice the weight of your coffee dose in hot water as a bloom — 30-gram dose, 60 grams of water. Wait 30 seconds. Then pour slowly and evenly in circular motions, maintaining the water level, until you’ve reached your target weight. Total brew time should be 3 to 4 minutes. If it’s draining much faster, grind finer. If it’s stalling, grind coarser.
A Hario V60 ceramic pour-over dripper is around $20 to $30. A Chemex is $40 to $50 and doubles as something that actually looks good on the counter, which matters at 6 a.m. Both are correct answers.
French Press
Full immersion brewing. Grounds sit in hot water for four minutes, then you press the metal filter down and pour. No paper filter means oils remain in the cup — heavier body, richer mouthfeel, slightly less clarity. Great for natural-processed coffees with big fruit and body. Less ideal for delicate washed coffees where the clarity is the point.
Ratio and temperature still apply. Coarser grind than pour-over — you want less surface area since the grounds sit longer in the water. If the French press tastes bitter or muddy, you’re grinding too fine.
A good French press — Bodum Brazil, Frieling stainless steel — runs $25 to $80 and requires essentially no skill beyond timing. It’s the most forgiving method on this list. Also the hardest to clean, which nobody mentions until you’ve owned one for a week.
AeroPress
A plastic immersion brewer that produces a concentrated, espresso-adjacent cup. Portable. Nearly indestructible. Versatile enough that there are annual world competitions around brewing variables. Interesting to experiment with. Not the best tool for tasting a delicate single origin for the first time — too much compression, too little transparency. Great for travel, for camping, for when you want to make coffee over a camp stove without it being a disaster.
At around $35, it’s one of the best value-per-cup pieces of coffee equipment available. If you camp, hike, or travel with any regularity, just buy one.
Automatic Drip (Done Right)
Most drip machines don’t reach the right brew temperature and don’t distribute water evenly over the grounds. The result is uneven extraction and a cup that never quite gets there regardless of the beans.
There are exceptions. The Technivorm Moccamaster is the benchmark — $300 to $350, built in the Netherlands since 1968, brews at the correct temperature, distributes evenly, and produces a clean cup that rivals a manual pour-over. If you want the quality of a pour-over without the daily hands-on process, the Moccamaster is the honest answer.
Everything else in the drip category is a compromise. Some compromises are acceptable. Most grocery-store-aisle drip machines are not.
Common Mistakes and What They Actually Cause
Grinding too fine: Bitter, harsh, over-extracted. The grounds had too much surface area and the water pulled everything out, including the compounds that aren’t worth having.
Grinding too coarse: Sour, thin, flat. The water passed through without extracting enough. Tastes like the idea of coffee rather than coffee.
Water too hot: Scorched. Top notes gone. Bitter finish. You burned off what the altitude and processing spent months building.
Water too cold: Under-extracted. Weak. Sour. The chemistry didn’t complete.
Wrong ratio: Too much water = diluted and over-extracted. Too little water = strong but underdeveloped and probably bitter.
Old coffee: No crema. Flat aroma. Dull taste. Coffee has a meaningful shelf life post-roast — 2 to 4 weeks for peak flavor. Buy in smaller quantities more frequently. Buy whole bean. Grind fresh.
Unclean equipment: Old coffee oils go rancid. A French press or pour-over dripper that hasn’t been fully cleaned in a week is adding stale oil to your fresh grounds. Clean your equipment. Not occasionally. Regularly.
A Realistic Morning Setup
Here’s what a functional, high-quality home coffee setup looks like without overspending:
Entry level (under $100 total):
- Timemore C2 manual hand grinder (~$50)
- Hario V60 dripper (~$25)
- Basic gooseneck kettle, any brand (~$20)
- Digital kitchen scale, 0.1g accuracy (~$15)
That’s it. That setup produces a better cup than most cafés if you’re using good beans and following the process.
Mid-level (under $300 total):
- Baratza Encore electric burr grinder (~$170)
- Chemex 6-cup (~$45)
- Bonavita 1L temperature-controlled kettle (~$50)
- Digital kitchen scale (~$15)
Same beans, less effort, more consistency. The electric grinder removes the only manual labor from the process. The temperature-controlled kettle removes the guesswork.
If you want automatic drip:
- Technivorm Moccamaster (~$330)
- Baratza Encore or equivalent grinder
- Same scale and filtered water
That combination produces a cup that the drip machine’s reputation says isn’t possible. It turns out the drip machine’s reputation was based on machines that couldn’t hold the right temperature.
What You’re Actually Doing
Brewing specialty coffee at home isn’t complicated. It’s just specific.
You’re taking a bean that spent months developing at 1,600 meters in volcanic soil in Panama, that was harvested by hand at peak ripeness, that was processed with enough care to preserve what the altitude built, that was roasted at the right temperature to develop the bean without destroying it — and you’re completing the chain by extracting it correctly.
Every step in that chain mattered. Yours does too.
You don’t need to be obsessive about it. You need to be deliberate. There’s a difference. Obsessive is 45 minutes and a spreadsheet. Deliberate is eight minutes, clean equipment, the right temperature, and paying enough attention to notice what’s in the cup.
That’s the whole practice. And once it’s a habit, it doesn’t take any effort at all. It just takes a few minutes before everything else starts.
Morning Tolerance is built for that window. Start there.
Add it to the cart. You already know what you’re doing with it.
Grumpy Dad Co. — Built for people who’ve stopped settling. Explore Morning Tolerance and the full Coffee, Tea & Espresso collection at grumpydadco.com
FAQ
What’s the most important thing for brewing better coffee at home?
The grinder. Upgrading from a blade grinder to a burr grinder is the single biggest improvement most people can make, because uniform grind size is what makes extraction even. Better beans can’t fix a bad grind.
Do I really need a burr grinder, or is a blade grinder fine?
A blade grinder technically works the way a steak knife technically bones a fish — not well. Blades chop beans into a chaotic mix of fine powder and coarse chunks, so part of your cup over-extracts (bitter) while part under-extracts (sour). A burr grinder crushes every particle to roughly the same size for a consistent cup.
What temperature should water be for coffee?
195°F to 205°F. Boiling water at 212°F scorches light and medium roasts and pulls out bitter compounds too aggressively. No thermometer? Bring water to a boil, take it off the heat, and wait 30 to 45 seconds.
What is the best coffee-to-water ratio?
Start at 1:16 — about 60 grams of coffee per liter of water, or one gram of coffee per 16 grams of water. It’s your baseline, not your sentence: use less coffee if the cup tastes too strong, more if it tastes thin.
How long does coffee stay fresh after roasting?
Whole beans hit peak flavor 2 to 4 weeks post-roast. Buy whole bean in smaller quantities, store it airtight, and grind right before brewing — pre-ground coffee is an open container of flavor leaking into the air.
Which brewing method is best for a delicate single origin?
Pour-over (V60, Chemex, or Kalita Wave). The paper filter gives the cleanest, most transparent extraction, which matches the clarity of a washed, high-altitude coffee. French press adds body and oils that suit bigger natural-processed coffees but muddy a delicate cup.