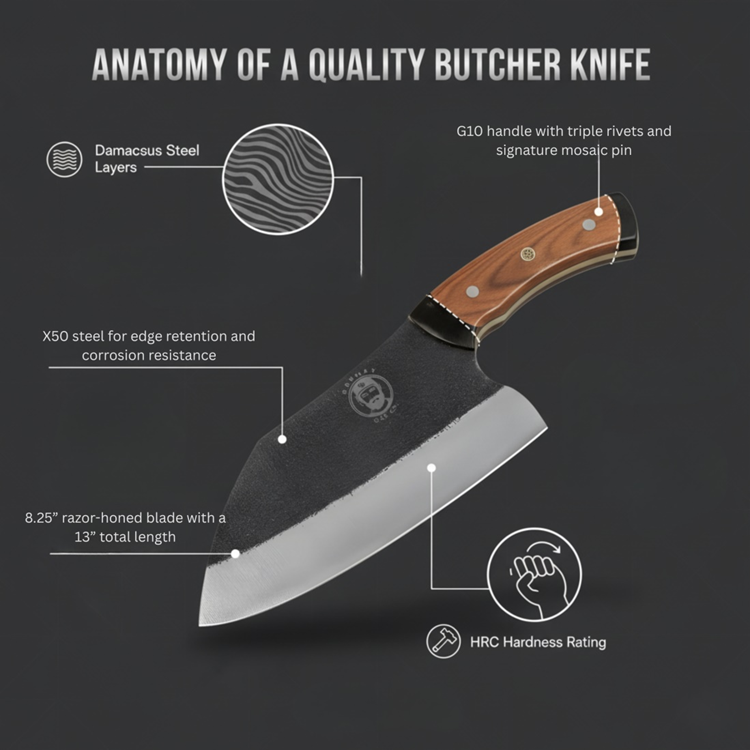
Kitchen Counter Layout for Cooks: Where the Knives Should Live (And the Rest of It)

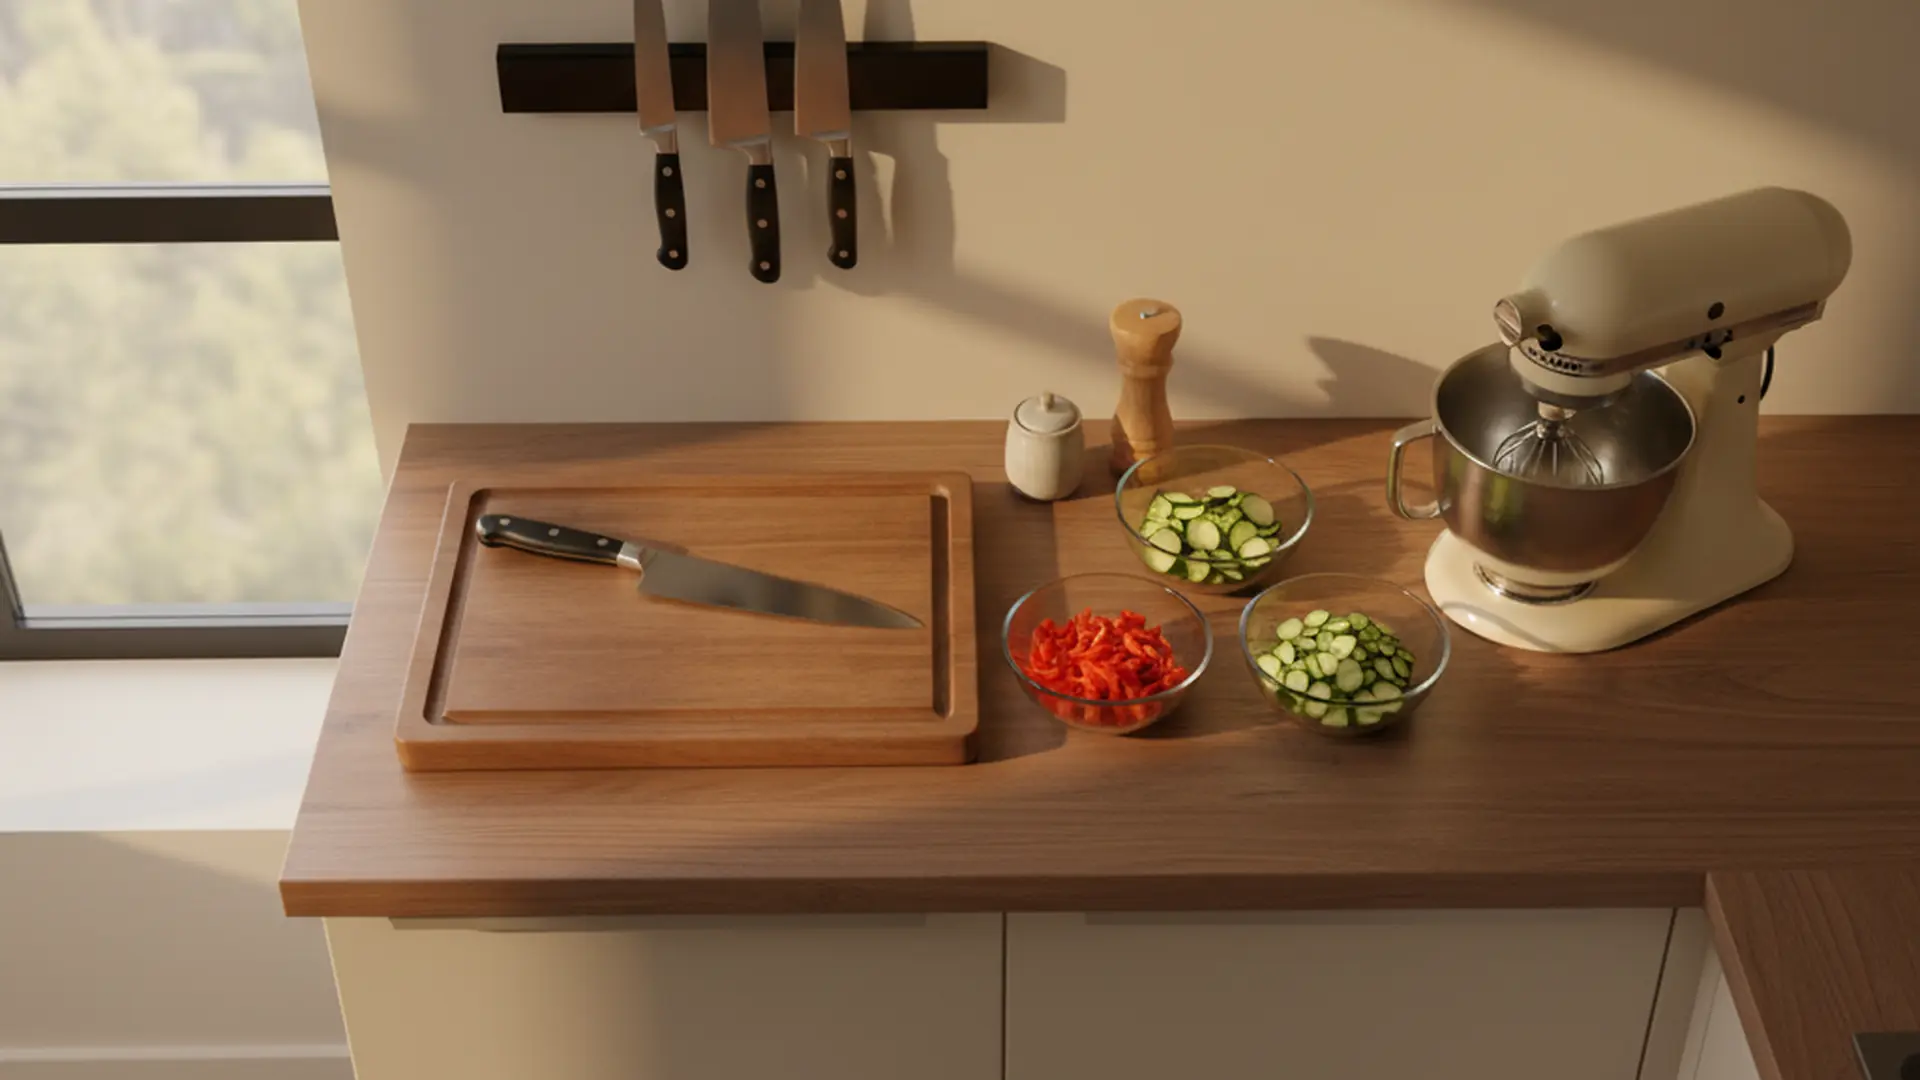
Walk into most American kitchens and look at the counter. There’s a Keurig nobody uses. A toaster from 2014. A bowl of fruit that’s been there since Tuesday. A KitchenAid mixer in the corner gathering pancake batter dust. A knife block with 14 slots and 3 used knives. A cookbook stand. Decorative ceramics. The work surface — the actual reason counters exist — is whatever flat space hasn’t been claimed by stuff.
Then you wonder why making dinner feels like assembling IKEA furniture in a closet. The kitchen’s not too small. The kitchen’s full of objects that aren’t earning their square footage.
Here’s the thing nobody designs around: kitchens are workspaces first and decor second. A great cook in a poorly-laid-out kitchen is slower than a mediocre cook in a well-designed one. The fix isn’t a renovation. It’s rearranging what’s already there around how you actually use the room. Most home kitchens lose 30% of their counter productivity to bad layout.
This is the no-nonsense breakdown. The four cooking zones every kitchen should have. Where the knife and cutting board should live (it’s not in the block). What deserves prime counter real estate vs. cabinet exile. The small layout changes that cut prep time noticeably. And the dad-friendly audit you can do this Saturday.
The 30-second answer
Four zones every kitchen needs: prep zone (largest counter, knife + board + trash), cooking zone (next to the stove, oils and spices), cleaning zone (sink + dish soap + drying rack), storage zone (everything else). Knives live on a magnetic strip in the prep zone, not in a block on the counter. Cutting board lives on the counter, ready to use. Most decorative items get exiled to display shelves outside the work zones.
Why most kitchens are designed wrong
Kitchens come from architects who model “use cases” rather than from cooks who watched how their hands move during dinner. The result: counter space allocated to where the architect thought it should be, not where it’s needed.
Common design failures:
- Tiny prep counter next to the fridge (where nobody wants to prep).
- Big counter past the stove with no clear purpose.
- Decorative tile backsplash where a magnetic strip belongs.
- Knife block consuming 18 inches of prime counter for 6 knives.
- Spice rack across the room from the stove.
- Trash can in a closed cabinet where you can’t sweep peelings into it during prep.
The fix is reorganization, not demolition. Move objects to match the workflow.
The four cooking zones
1) Prep zone (the most important)
Where 70% of cooking actually happens — chopping, mincing, slicing, peeling, mixing. Should be the largest open counter space in the kitchen.
Essentials within arm’s reach:
- Cutting board (large, on the counter, ready to use).
- Chef’s knife and paring/petty knife (magnetic strip mounted at eye level).
- Trash can or compost bowl (foot pedal trash can ideal — sweeps peelings off the board with one motion).
- Salt cellar and pepper mill (small bowl of kosher salt for hand-grabs).
- Olive oil bottle.
- Kitchen towel within reach.
- Mise en place bowls (small prep bowls, easy access).
The prep zone should be at least 18 inches of clear counter, ideally 24+. If yours is smaller, something needs to leave.
2) Cooking zone (next to the stove)
Where heat happens. Smaller than the prep zone but high-traffic during active cooking.
Essentials within arm’s reach:
- Cooking oils (within 24 inches of stove, off-counter is fine if a small caddy is at hand).
- Salt and pepper at the stove (separate from prep stash — multiplies tools but saves steps).
- Wooden spoons, tongs, spatulas (in a crock or hanging).
- Stove-top spices (cumin, paprika, garlic powder, red pepper flakes — the big-use ones).
- Pot holders or oven mitts.
- Trash bowl or compost (separate from prep one, for stove-side cleanup).
If the stove is on a wall, a small shelf above with frequent-use spices saves dozens of trips per dinner. Magnetic spice tins on the side of the stove or fridge are an underrated solution.
3) Cleaning zone (the sink)
Where dishes go to die. Or live, depending on who’s home.
Essentials within arm’s reach:
- Dish soap.
- Sponge or scrubber.
- Drying rack or towel.
- Trash for the inevitable food bits.
The sink itself is for cleaning. Keep prep work out of the sink area — wet sink + sharp knives + slippery food = injuries.
4) Storage zone (everything else)
Where the toaster, blender, mixer, coffee maker, and miscellaneous appliances live.
Question to ask each appliance: do I use this 3+ times a week?
- Yes: deserves counter space.
- No: cabinet, pantry, or basement.
The toaster used twice a year is not earning its 14 inches. The KitchenAid mixer used for one batch of cookies in October is not earning its 16 inches.
The knife storage truth
Most American kitchens store knives in a wooden knife block on the counter. The block:
- Eats 14–18 inches of counter.
- Hides knives from view (you grab the wrong one).
- Has hygiene issues (closed wood slots can grow mold).
- Forces edge-down storage that dulls knives over time.
The better option: magnetic strip on the wall above the prep zone. Visible knives, no edge contact, easy to grab the right one, zero counter space.
- Magnetic walnut strip: 12–18 inches long, $35–$80.
- Mount at eye level (60–66 inches off the floor for most adults).
- Above the prep counter, away from the stove splatter zone.
- Above kid reach if young children are in the household.
For families that prefer hidden storage: in-drawer knife organizer in a prep-zone drawer. Zero counter space, fully protected blades, kid-safe.
(Full storage breakdown in our Knife Storage 101 guide.)
The cutting board placement question
Most cutting boards live in cabinets or leaned against the backsplash. Then they come out for cooking and go back. Why? Because the kitchen doesn’t have a designated spot for them.
The smart move: cutting board lives on the counter, ready to use.
- One large hardwood end-grain board (15×20″ or bigger).
- Lives in the prep zone, on top of a damp dish towel for grip.
- Stays out 24/7 except during deep clean.
If the kitchen has multiple cooks: keep one large board out, plus an HDPE plastic board in a nearby cabinet for raw meat work. (See our Cutting Board Showdown.)
The friction of getting the board out for every cooking session is the silent reason home cooks “don’t have time to cook.” Removing that friction changes daily behavior.
What earns counter real estate
The 3+ times a week rule is the filter. Pass the filter, you stay. Fail it, you go.
Stays out (used 3+ times a week):
- Cutting board.
- Knife magnetic strip (mounted, not on counter).
- Salt cellar.
- Pepper mill.
- Olive oil bottle (the everyday one, not the showcase Spanish bottle).
- Coffee maker (if you make coffee daily).
- Toaster (if you use it daily).
- Spoon rest near the stove.
- Crock with cooking utensils.
Goes in cabinet (used less often):
- Stand mixer (unless you bake weekly).
- Blender (unless smoothies daily).
- Food processor.
- Slow cooker / Instant Pot (out of season).
- Bread machine.
- Specialty appliances (juicer, pasta maker, ice cream maker).
- Decorative cookware (the $200 Le Creuset everyone displays).
Goes elsewhere (basement/pantry/donate):
- Appliances unused in 12+ months.
- Wedding gifts you’ve never opened.
- Backup appliances (the second slow cooker, the spare toaster).
- Decorative ceramics that aren’t used.
The friction principle
Cooking happens or doesn’t happen based on how much friction stands between “I want to cook” and “I’m cooking.”
High friction = fewer home-cooked meals:
- Cutting board buried in cabinet behind 4 other things.
- Knives in a drawer mixed with utensils.
- Spices on a shelf across the kitchen.
- Trash can hidden inside a cabinet that requires opening.
- Salt in a sealed container at the back of the pantry.
Low friction = more cooking:
- Cutting board on counter, knife on strip, board ready in 3 seconds.
- Open salt cellar within hand-reach of where prep happens.
- Foot-pedal trash can next to prep zone.
- Foundation spices (salt, pepper, oil) in their work zones.
Subtract 30 seconds of friction per cooking session, multiplied by 4–5 sessions per week, and you’ve recovered hours per month. That’s the layout payoff.
The mounting strategy
Walls are more flexible than counters. Anything mounted to a wall doesn’t take counter space.
- Magnetic knife strip: covered above. Wall-mounted, eye-level.
- Magnetic spice tins: on the side of the fridge, the side of a cabinet, or a steel strip under an upper cabinet.
- Pot rack: ceiling-mounted or wall-mounted. Free up cabinet space, easy access during cooking.
- Cooking utensil rail: a stainless rail with hooks under upper cabinets. Hangs spatulas, tongs, slotted spoons.
- Paper towel holder: mounted under cabinet, not on counter.
- Cutting board hangers: wall hooks for hanging multiple boards vertically.
Every $10–$30 mounted accessory takes cabinet/counter pressure off the work zones.
The trash can question
The single most underrated kitchen layout decision: where the trash can is.
Wrong: trash can inside a closed cabinet
You have to open the cabinet, swing peelings/scraps off the board, close the cabinet. Multiply by 50 prep tasks per week. Closed cabinets are death by a thousand small frictions.
Wrong: trash can across the kitchen
You walk to the trash, scrape, walk back. Each trip eats 15 seconds. Adds up.
Right: foot-pedal trash can next to the prep zone
Step on the pedal, sweep board contents in, release. 2 seconds. Zero hand contact with the trash can. Zero “open cabinet” friction.
A $50 stainless foot-pedal trash can transforms the prep workflow. The cheapest big upgrade in kitchen workflow.
The “decorative kitchen” trap
Pinterest kitchens are decorated. Working kitchens are organized. The two are often opposites.
- Decorative bowl of lemons: looks great, blocks 8 inches of counter.
- Crystal salt grinder display: pretty, in the way during prep.
- Vintage scale on the counter: nostalgic, never used.
- Open shelves with rarely-used dishes: museum, not workspace.
- Espresso machine the size of a microwave for the once-a-week latte: real estate disproportional to use.
Decoration belongs above the working surfaces — a shelf at chest height, on top of cabinets, in corners. Not on the work zones.
Small kitchens: the special challenge
If you have under 30 square feet of counter total, you can’t have everything out. Brutal triage:
- Cutting board on counter. Non-negotiable.
- Knife magnetic strip on wall. Doesn’t count against counter.
- Salt + pepper + oil in a small caddy. One small footprint.
- Coffee/tea station OR toaster — pick one. Not both.
- Everything else in cabinets or pantry. Bring out only when actively used.
Small kitchens reward minimalism. Mounted storage (magnetic strips, pot racks, hanging utensils) makes more difference here than anywhere else.
The Saturday audit (do this once)
- Empty everything off the counter. Truly empty. Wipe surfaces.
- Sort the removed items into three piles:
- Used 3+ times a week.
- Used occasionally.
- Used in the last 12 months: never.
- Pile 3 is donated, sold, or basement-exiled. No exceptions for “just in case.”
- Pile 2 goes in cabinets or pantry.
- Pile 1 returns to the counter — but in zones. Prep tools to prep zone. Cooking tools to cooking zone. Etc.
- Mount the magnetic knife strip. Move knives off the counter.
- Replace the trash can if it’s in a closed cabinet. Foot pedal, in the open, near prep zone.
- Cook a dinner. Notice the workflow improvement.
Total time: 2–3 hours. Total cost: $0–$200 depending on what you mount or replace. Lifetime workflow improvement: real.
The Grumpy Dad ideal kitchen layout
For a typical American kitchen with a stove on one wall, sink on another, and counter L-shape:
- Long counter between sink and stove: prep zone. Cutting board permanently out, magnetic knife strip above, salt + pepper + oil in a small caddy. Trash can foot-pedal at the end.
- Counter to the right of stove (1–2 feet): cooking zone. Tools crock, oil bottle, salt and pepper, spoon rest, frequent spices.
- Counter near sink: cleaning zone. Dish soap, sponge, drying rack.
- Far counter or peninsula: storage zone. Toaster, coffee maker, fruit bowl, anything daily-use that doesn’t fit elsewhere.
- Walls and under-cabinet space: mounted utensil rail, paper towel holder, magnetic spice tins, knife strip.
- Cabinets: stand mixer, blender, food processor, slow cooker, second cutting board (HDPE for raw meat), bulk pantry items.
What this isn’t (managing expectations)
This isn’t a renovation guide. We’re not moving cabinets. We’re not changing the kitchen layout structurally. The strategy: work with what’s already there, just better.
If your kitchen has fundamental design flaws (sink across from stove with no counter between them, fridge blocking traffic flow, work triangle distance over 26 feet), those are renovation conversations. The reorganization here helps any kitchen, but won’t fix a structurally broken one.
Common mistakes to avoid
- Buying organizational tools before deciding what’s leaving the kitchen. Cabinets full of organizers full of stuff = same problem, more storage.
- “Maximizing storage” without questioning what needs to be stored. The goal is fewer things, not more places.
- Putting decorative items in work zones because they “look nice.”
- Mounting the knife strip too low (kid reach) or too close to the stove (splatter zone).
- Keeping a knife block “for guests” even though you don’t use it.
- Hidden trash cans because they “look cleaner.” Closed-cabinet trash adds friction that quietly reduces home cooking.
- Decorating before designing. Design the workflow first, decorate second.
Marketing traps in kitchen organization
- “Pull-out spice rack” cabinet inserts. Sometimes useful, often overengineered. A magnetic spice tin row on the fridge does the same thing for $15.
- “Universal countertop appliance garages.” Ugly, expensive, take more space than the appliances inside.
- “Decorative knife blocks.” The aesthetic of the block is irrelevant. Function matters more than wood species.
- “Matching kitchen container sets.” Pretty, often the wrong size for actual ingredients. Buy by what fits, not by aesthetic match.
- “Universal kitchen tool kits” with 47 utensils. Most are duplicates of basics or single-purpose gimmicks. 12 good utensils beat 47 mediocre ones.
If you only remember five things
- Four zones: prep, cooking, cleaning, storage. Tools live in their zones.
- Knives on a magnetic strip, cutting board on the counter. Both reduce friction.
- 3+ times a week or it doesn’t earn counter space.
- Foot-pedal trash can near prep zone. Cheap upgrade, big impact.
- Decoration belongs above the work surfaces, not on them.
FAQ
What if I have a galley kitchen with no real space?
Mount everything you can — knives, utensils, paper towels, spices. Use the wall space. Cutting board lives on the counter, but a smaller one (12×16″). Limit to 2 daily-use appliances total. Galley kitchens force minimalism, which is sometimes a feature.
Where should I put the trash can if my kitchen layout doesn’t allow it near the prep zone?
Compromise with a “compost bowl” or “scrap bowl” on the prep counter that you empty into the trash periodically. Saves trips while keeping the prep zone clean. A medium stainless bowl works for $10.
Are open shelves better than closed cabinets?
For frequently-used items, yes — visible, easy access, low friction. For everyday clutter, closed cabinets hide chaos. Best mix: some open shelves for daily dishes/glassware, closed cabinets for everything else.
How do I convince my partner the knife block needs to go?
Demonstrate. Mount a magnetic strip in the prep zone. Use it for two weeks. The block disappears on its own once they see how much counter you’ve recovered. Don’t sell the change abstractly; just demonstrate.
What’s the most-overlooked kitchen layout improvement?
Lighting. Most kitchens have one overhead light that throws shadows on the work surfaces. Under-cabinet LED strips ($30, peel-and-stick or hardwired) double the visibility on the prep zone. Surprisingly transformative.
Should I get a kitchen island?
If your kitchen can fit one without crowding traffic flow (3 feet of clearance on all sides), yes. The extra prep counter is gold. If the kitchen is small, a portable kitchen cart is the flexible alternative — pull it out when needed, push it against a wall otherwise.
Are pot fillers near the stove worth it?
Convenient but not transformative. The friction reduction is small (one trip from sink with a heavy pot vs. filling at the stove). The cost (plumbing, install) is high. Skip unless you’re already renovating the wall behind the stove.
The Grumpy Dad Promise
Audit your kitchen this Saturday. Empty the counters. Triage by use frequency. Move the knives to a magnetic strip. Put the cutting board out permanently. Replace the hidden trash can with a foot-pedal model. Banish the appliances you haven’t used in a year.
The kitchen will look weirdly empty for a week. Then you’ll cook in it. The empty counter isn’t unfinished — it’s the work surface the kitchen always wanted to have. Now go cook something. The room is finally ready.