Camping Coffee: How to Make a Good Cup 50 Miles From a Café

The worst cup of coffee most people have ever had was at a campsite.
You know the one. Boiled in a pot over a camp stove with whatever was in the bag from the gas station. Grounds floating on the surface. Tepid by the time anyone filled a cup. Tasting of smoke, aluminum, and the specific despair of having driven three hours to sleep on the ground.
The worst cup of coffee most people have ever had was also, somehow, one of the best mornings.
That’s camping. The conditions strip away everything that usually matters and leave the essentials — the fire, the air, the coffee that’s objectively mediocre but tastes better than anything because of where you are.
This guide doesn’t promise to fix camping coffee. It promises that the coffee you make at a campsite can actually be good, with the right gear and a small amount of intention. And good coffee at a campsite — good coffee with that air, that fire, that morning — is better than almost anything you’ll make at home.
The Variables That Change at Camp
Home brewing has controlled conditions. Temperature-controlled kettle. Filtered water. Calibrated grinder. The camping version of each of these is different.
Water source: Camp stove water from a pot reaches boiling (212°F) and then you have to manage it off the heat. Most camp stoves don’t have precision temperature control. The workaround: bring the water to a full boil, remove it from the heat, and wait 45 to 60 seconds before brewing. You’ll be in the 195°F to 205°F range. Close enough.
Water quality: If you’re filtering backcountry water, it’s clean but may have a flavor profile from the mineral content of the source. For day use at a campsite, carry your own water. For multi-day backcountry: filtered water works fine for coffee. The minerals can actually improve extraction — you want some dissolved solids, not pure distilled water.
Grinding: You either grind at home before the trip and pack pre-ground, or you bring a hand grinder. Grinding before the trip is simpler and means you’re using slightly less fresh grounds. Bringing a hand grinder adds one piece of gear and produces a measurably better cup. Your call based on how much you care and how much weight you’re willing to carry.
Method: Filtered pour-over, AeroPress, French press, percolator, or cowboy coffee — each produces a different result with different gear weight. Pick based on your setup and your priorities.
The Methods, Ranked for Camp Use
1. AeroPress (The Recommendation)
The AeroPress is the best camping coffee maker for most situations. Here’s why:
It weighs 6 ounces. It produces no breakable glass. It tolerates rough handling. It makes a clean, concentrated cup with a paper filter that can be diluted or drunk straight. It works with water that’s slightly below optimal temperature — the pressure extraction compensates for imprecision in a way that pour-over doesn’t. Cleanup is one push of the plunger and a rinse.
The AeroPress Go ($35) is the version designed for portability — it packs into its own travel mug, which doubles as your camp cup and the vessel you brew into. The whole kit fits in a side pocket of most packs.
Camp AeroPress recipe:
– 18 grams of coffee (roughly 3 level scoops), medium-fine grind
– 250ml of water at approximately 195°F–205°F (45–60 seconds off a full boil)
– Invert method: place AeroPress inverted (cap end up), add coffee, add water, stir once, steep 90 seconds, cap with a rinsed filter, flip onto your mug, press over 30 seconds
– Drink it straight as a concentrate, or add an equal amount of hot water for a full-size cup
You can make a decent AeroPress cup without the inverted method — the standard method works. Inverted gives you more control over steep time, which matters slightly more when other variables are less precise.
Hand grinder pairing: The Timemore C2 at $50 or the 1Zpresso JX at $90 are compact enough to carry in a pack. 18 grams takes about 60 seconds to grind by hand. That’s the only active work in the whole process.
2. Pour-Over (Light Option)
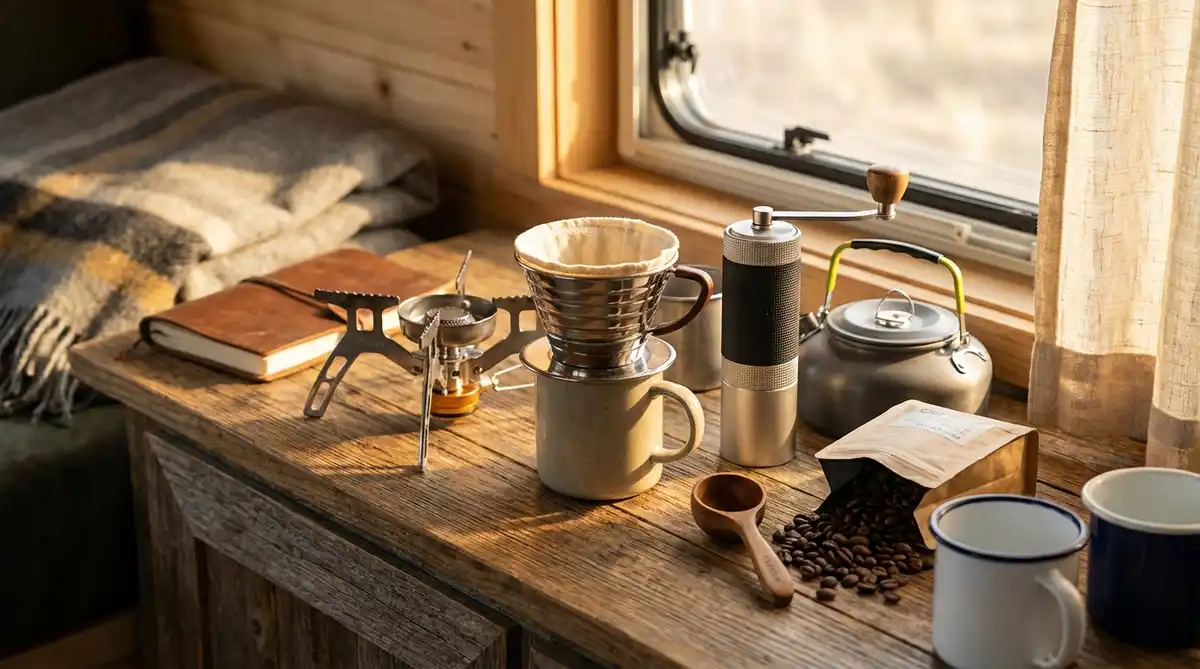
A collapsible silicone pour-over dripper — various brands, around $10 to $15 — collapses flat and weighs almost nothing. Pair it with paper filters (folded flat in a ziplock), a kettle or pot for water, and whole beans with a hand grinder.
The result is a clean, transparent cup that’s as good as your home pour-over, assuming the water temperature is managed correctly.
The limitation: Pour-over is less forgiving of imprecision than AeroPress. If the water is too hot or too cold, or the grind is slightly off, the cup reflects it immediately. At a campsite where every variable is slightly looser than at home, this matters.
Best for: Car camping where you have room for a kettle, don’t mind the slight extra precision requirement, and want a genuinely high-quality camp cup. Backpacking: the AeroPress is more forgiving per gram of gear weight.
3. French Press (Car Camping)
A stainless steel French press — GSI Outdoors Commuter Java Press or similar — is the right choice for group camping where you’re making 3 to 4 cups at once.
Heavier than AeroPress or pour-over. Stainless versions don’t break. The plunger and mesh filter produce a full-bodied cup with some fine particles — classic camp coffee texture. Works well with medium to dark roast coffees where the body is a feature.
Camp French press recipe:
– 55 grams of coarsely ground coffee for 800ml of water (1:15 ratio)
– Hot water (off the boil, 30 seconds)
– Stir once, steep 4 minutes
– Press slowly, pour immediately — don’t let it sit on the grounds after pressing
The limitation: More cleanup than AeroPress. The plunger system traps fine grounds and requires rinsing at a water source, which at a campsite means a short walk to the faucet or water supply.
4. Moka Pot (Camp Stove Espresso)
A compact aluminum moka pot — Bialetti makes the standard — produces strong, espresso-adjacent coffee over a camp stove. Works on any heat source that accepts the moka pot base.
The limitation: The moka pot produces pressure-extracted coffee but not espresso — the pressure is lower than a proper espresso machine. The cup is strong and coffee-forward but bitter if over-extracted, which is easy to do over an uneven camp stove flame. For campers who like strong, dark coffee: this works and requires minimal gear.
5. Cowboy Coffee (The Default)
Grounds in a pot of boiling water. Steep. Remove from heat. Let settle. Pour carefully.
It produces a cup with floating grounds, slightly bitter flavor, and that specific camping character that has nothing to do with technique and everything to do with context.
If this is what you have: fine. Let the water come fully off the boil before adding grounds, steep 4 minutes, pour slowly, and it’ll be tolerable. Add a splash of cold water after steeping to help the grounds settle.
It’s cowboy coffee. It’s not supposed to be remarkable. It’s supposed to be hot, caffeinated, and outdoors.
The Beans for Camp
The best camping coffee is the same quality beans you’d use at home. That’s it. Packing a bag of Morning Tolerance and an AeroPress is a completely reasonable camping setup, and the cup you produce at a campsite with good beans and an AeroPress is legitimately good coffee.
Practical notes:
Pre-ground vs. whole bean: Pre-ground is simpler and lighter. If you’re carrying a hand grinder anyway for the weight budget, grind fresh. If you’re not, pre-ground from a bag ground specifically for your brewing method works fine for a three-day trip. The flavor difference between pre-ground day-one and pre-ground day-three at a campsite is not the thing that will ruin your morning.
Packaging: A resealable foil bag works well for camping. Bring only what you’ll use — estimate 20 to 25 grams per cup, add a small buffer. A full bag of Morning Tolerance (120 grams) yields roughly 5 to 6 AeroPress cups.
The single-serving option: Some specialty roasters produce pre-portioned single-serve drip bags — a filter and the right amount of coffee packaged together, one bag per cup. You pour hot water through it into your mug. Convenient, light, and better than anything pre-made. Grumpy Dad doesn’t currently offer these, but they exist in the specialty market and are worth knowing about for ultralight packing.
The Kit, By Use Case
Weekend car camping (1 to 4 people):
– AeroPress or French press (stainless)
– Timemore C2 hand grinder or pre-ground
– Morning Tolerance or equivalent quality bag
– Camp stove kettle
Approximate weight beyond the kettle: under 1 pound. Quality of cup: genuinely good.
Backpacking (1 to 2 people):
– AeroPress Go
– Timemore C2 hand grinder
– Pre-portioned coffee in small zip bags (20 grams per cup)
– Paper filters in a small ziplock
Approximate added weight: 12 to 16 ounces. Quality of cup: significantly better than anything else at this weight.
Ultralight (single person, weight-critical):
– Collapsible silicone pour-over dripper (30 grams)
– Paper filters
– Pre-ground coffee in individual daily bags
Approximate added weight: under 2 ounces beyond the filters and coffee. Quality of cup: good if water temperature is managed. Less forgiving than AeroPress in windy or cold conditions.
The Part That Makes It Right
Every camping coffee method produces a cup that’s slightly imprecise. The grind isn’t as consistent as a dedicated electric burr grinder. The water temperature isn’t held to 202°F. The pour rate isn’t controlled with a gooseneck kettle.
None of that matters.
The cup is made outside. Your hands are around it while the morning does what campsite mornings do — light coming through trees, fire from last night’s coals, the specific silence of being somewhere without ambient noise. The imprecision in the extraction is the smallest variable.
Make the cup as well as the gear allows. Drink it outside.
It’ll taste better than anything you’ve brewed this week.
Grumpy Dad Co. — Good coffee belongs outside too.
Browse the camping and hiking collection and Morning Tolerance at grumpydadco.com