Thanksgiving Prep: The Knife Work, The Bird, The Timing


Thanksgiving is the most stressful cooking day of the year for one reason: everything has to be done at the same time.
The turkey needs the oven for three to four hours. The sides need the oven too. The gravy needs the drippings from the turkey, which aren’t available until the turkey is done. The turkey can’t rest until it’s done, which means carving can’t start until the sides have been waiting. And there are twelve people in your house who have been sampling wine since noon and are asking when they can eat.
The solution is not a better recipe. It’s a better plan.
This guide covers the turkey — the method, the knife work, the timing — and how to structure the day so that the most logistically complicated meal of the year doesn’t require you to be stressed, absent, and sweating when everyone sits down.
The Bird: Method First
There are two correct methods for Thanksgiving turkey. Everything else is a variation on one of these.
Method One: Spatchcock (The Faster, Better Option)
Spatchcocking — removing the backbone and pressing the bird flat — cuts cook time nearly in half, produces more evenly cooked meat, and creates the best turkey skin achievable in a home oven. The breast and thigh cook at the same rate because they’re the same distance from the heat. The entire skin surface is exposed to direct oven heat. The bird roasts in 80 to 100 minutes rather than three to four hours.
The trade-off: it doesn’t look like a whole roasted turkey. It looks like a flattened bird. For households that value presentation of the whole bird at the table, this is a genuine objection. For households that value eating on time with meat that isn’t dry — which should be all households — this is the correct method.
The backbone removal: Kitchen shears on both sides of the backbone, from tail to neck. Cut through the rib bones, not through the spine — stay approximately one inch from the center on each side. The backbone comes free and goes into a pot for turkey stock immediately. A sharp chef’s knife can also do this if the shears aren’t available, but shears are more controlled.
Season the night before: After removing the backbone and pressing the bird flat, season aggressively under the skin — salt and pepper directly on the breast and thigh meat, not just on the skin surface. This is the only way to properly season a turkey. Salting the skin salts the skin. Salting under the skin seasons the meat. Do both.
Dry brine is the correct approach for Thanksgiving turkey: kosher salt applied the night before, uncovered in the refrigerator overnight. The salt draws moisture out, dissolves, and gets reabsorbed — seasoning the interior and drying the surface for better browning. No wet brine tub required. No brining bag. Just salt, the bird, and the refrigerator overnight.
The cook: Roast at 425°F on a wire rack set over a sheet pan or in a roasting pan. 80 to 100 minutes for a 12 to 14-pound bird. Pull at 155°F in the thickest part of the breast — carryover will bring it to 160°F during the 20-minute rest.
Method Two: Whole Roasted (The Traditional Option)
If the whole bird presentation matters: the standard whole roast, done correctly, produces acceptable results. The challenge is the temperature differential between breast and thigh — the breast is done at 160°F, the thigh is best at 175°F. These temperatures are 15 degrees apart, which means either the breast is slightly overcooked by the time the thigh is done, or the thigh is slightly undercooked when the breast is at its best.
The best workaround: start breast-side down, finish breast-side up. The initial breast-down period protects the breast from direct heat during the first half of the cook, letting the thighs build temperature faster. Flip for the final hour to brown and crisp the breast skin.
Alternatively: Use an aluminum foil tent over the breast during the final 30 minutes if the breast is at temperature before the thighs.
Cook: 325°F for 13 to 15 minutes per pound. Probe thermometer in the thickest part of the breast, not touching bone. Pull at 160°F in the breast, verify 175°F in the thigh.
The Knife Work That Matters
Two tasks require a sharp blade and a clear head: preparing the bird before it goes in, and carving it after.
Before the Cook
Trimming excess fat: The cavity and neck area often have deposits of yellow fat that render out and can make the pan drippings overly greasy. Remove the obvious large deposits. Leave the fat under the skin on the breast — it bastes the meat during roasting.
Separating the skin from the breast: Slide your hand under the skin from the cavity opening, separating it from the breast meat. Be careful not to tear the skin — especially at the thinner areas near the top. Once separated, you can push butter, herb butter, or seasoning directly against the meat under the skin. This is the technique that produces a properly seasoned breast.
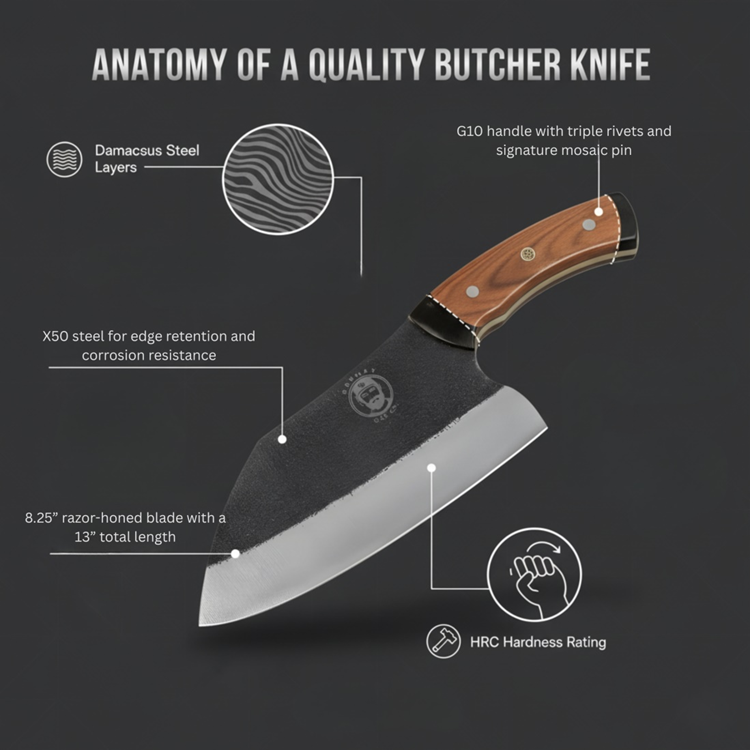
The Grumpy Dad Butcher Knife handles the backbone removal and any heavy trimming with the control its weight and geometry are built for. For the more delicate skin-separation work and anything requiring a precise tip, the Damascus Chef Knife is the right switch.
Carving at the Table
Carving is where most Thanksgiving turkeys are ruined — not in the oven, but on the cutting board, with a dull knife in front of an audience.
A dull carving knife tears rather than slices. Tearing the breast produces ragged, uneven pieces and pulls juice out of the meat as the fibers separate roughly. A sharp knife separates the muscle fibers cleanly, keeping the juice in the meat.
The carve, step by step:
1. Remove the legs first. Pull each leg away from the body and cut through the hip joint — same technique as breaking down a whole chicken. Separate thigh from drumstick at the knee joint. Set aside.
2. Remove the breasts. Cut along one side of the breastbone, keeping the knife flat against the ribcage, and separate the entire breast lobe from the carcass in one piece. Repeat on the other side.
3. Slice the breast. Against the grain — perpendicular to the length of the breast — in slices approximately 1/3 to 1/2 inch thick. Long, confident strokes from tip to heel of the blade rather than short back-and-forth cuts. Each slice should be clean and uniform.
4. The thigh. Pull away from the drumstick. Slice the thigh meat away from the bone in long strips against the grain. Thigh meat is more forgiving of variable doneness and more flavorful than the breast — don’t rush this part.
Rest time is non-negotiable: 20 to 30 minutes for a spatchcocked bird, 30 to 40 minutes for a whole roasted one. During this time the internal temperature continues rising slightly and the juices redistribute. A turkey carved immediately off the heat loses its juice to the cutting board. A properly rested turkey retains it.
Use the rest time to finish the gravy.
The Gravy: Don’t Skip the Drippings
The drippings in the bottom of the roasting pan — rendered turkey fat, caramelized skin debris, reduced cooking juices — are the gravy. Not an ingredient in the gravy. The gravy.
Simple pan gravy:
Pour off all but two tablespoons of fat from the pan. Place the pan over two stovetop burners over medium heat. Add two tablespoons of flour and whisk into the fat, cooking the roux for two minutes. Deglaze with 1/2 cup of white wine or turkey stock, scraping up all the browned bits from the pan bottom. Add 2 cups of hot turkey stock (from the backbone you boiled this morning). Whisk continuously until smooth. Simmer 5 minutes to thicken. Season with salt and pepper. Strain if you want it smooth. That’s the gravy.
The turkey backbone simmered in water for two hours this morning — with onion, celery, and a bay leaf — produced the stock that makes the gravy possible. This is the other reason spatchcocking is the right call: the backbone is available for stock before the bird goes in the oven.
The Timing Sheet
The most critical document in your Thanksgiving kitchen is a written timeline on the refrigerator door. Phones get put down. Kitchens get loud. A written timeline stays where you left it.
For a 2:00 p.m. dinner:
Wednesday evening:
– Spatchcock the bird and dry brine. Refrigerate uncovered.
– Make turkey stock from the backbone.
Thursday morning:
– 9:00 a.m. — Remove turkey from refrigerator. Let it sit at room temperature.
– 10:00 a.m. — Pies, if you’re making them.
– 11:30 a.m. — Prep sides. Cut vegetables. Make the mashed potato base (hold, reheat later).
– 12:00 p.m. — Turkey goes into 425°F oven.
– 1:20–1:40 p.m. — Turkey done (check at 1:20 with probe thermometer). Rest begins.
– 1:20–1:40 p.m. — All sides go into the oven while the turkey rests and takes the oven.
– 1:50 p.m. — Make gravy from drippings. Carve turkey.
– 2:00 p.m. — Dinner.
For a 4:00 p.m. dinner: Shift everything two hours later. The morning is yours.
The probe thermometer — the MEATER Plus or equivalent — removes all guesswork from the turkey’s cook time. You’re not checking every 20 minutes. You’re getting a phone alert when it’s done.
The One Thing Most People Get Wrong
They wait to make the stock.
The backbone, the neck, the giblets — these are the foundation of the gravy. If they go into a pot of water Wednesday night, the stock is made and refrigerated before Thursday morning starts. The gravy takes 10 minutes when the bird comes out of the oven.
If you don’t start the stock until Thanksgiving morning, or don’t make it at all and use canned broth instead, the gravy is acceptable. It’s not the same.
The best gravy on the table is made from the bird that made the dinner. This takes one pot and two hours the night before.
That’s the detail that makes the meal.
Grumpy Dad Co. — The right tools for the most important meal of the year.
Browse knives, thermometers, and the full catalog at grumpydadco.com